Sunday, October 24, 2010

Chocolate Covered Oreos


So, can you think of something tastier than the simple goodness of an oreo cookie?  I don't know too many people who don't like oreos and I can think of only one thing better than an oreo....

An oreo covered in chocolate!


I thought I would try my hand at these after I realized that getting that perfect shape around the oreos required a simple mold that I found online.  There are several places you can find oreo molds, but I found a great selection at Spinning Leaf.  They have all sorts of shapes and designs to choose from.  And right now they are sending a free mold with every order (bonus)!


For my first attempt, I decided to try to make bat ones for Halloween and some man in the moon face ones just because that face made me laugh.  These molds are a really good quality, easy to use and very easy to wash.  


I gathered up all my necessities.  Oreos, of course!  Chocolate candy wafers, a microwave safe bowl, a mold painter, a funnel and some Crisco or vegetable oil. Thanks so much to Bakerella for this tip.  I never knew this before, but adding a little vegetable oil or crisco as you melt your chocolate will thin it out and make it a lot easier to work with an pour.


Melting the chocolate in the microwave is pretty easy.  I did it in thirty second intervals in a microwave safe bowl, stirring after every thirty seconds.  I then used the funnel to transfer some of my orange chocolate into a mold painter, just a little bottle with a fine tip end.  This is a great tool if you want to paint on some colors in your mold.  


I used some orange to make the bats on my oreos stand out.  This took a little time, but once I got the hang of it, it went quickly.  Before moving on I had to let this set, so I stuck it in the fridge for about 10 minutes and took a break...I might have eaten an oreo or two along the way.


Then I melted some milk chocolate and poured it into the mold, filling about halfway.  I dropped the oreos in next, twisting each one slightly as I did to be sure that the groove between the two cookies got filled in with chocolate.  The chocolate began to come up over the top of the cookie.


Then I spooned a little more chocolate over the rest of the oreo to cover it up.  Its important not to overfill (as I did on some) because it makes the edge of your cookie come out unsmooth. And back in the fridge for a little while to set.


When they were done, they popped right out of the mold.  You can see how a few had less than perfect edges...but no too bad for my first attempt!


I used the leftover orange (rather than waste it) and some mint flavored dark chocolate for these guys.  The mint was a nice touch too.  Kind of made it hard to decide which to eat first.


And they were a big hit with everyone!

So, give it a try and let me know how it goes. 
I am looking forward to trying it again.  Next up: Yo Gabba Gabba inspired oreos.  I'll keep you posted.


Wednesday, October 13, 2010

The Wedding Tree

A GREAT ALTERNATIVE TO A
WEDDING GUEST BOOK


Have you ever gone to a wedding and drawn a total blank when faced with an empty page in the guestbook?  Wishing you could think of something witty and heartfelt, but forced instead to go with the predictable "Best Wishes?"  I know I have.  And as a bride, wouldn't you like to wow your guests with something new and different?  Something that does not require a lot of thought or eloquence, but that truly lets them leave their mark on your big day?  Well, then I have found just the thing for you!


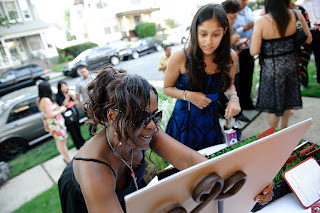
Check out this wedding tree by LovliDay Wedding Designs - The concept is simple.  Guests immortalize their presence at your wedding by using their thumbprint to create leaves on your wedding tree.  No thought.  No need to be witty or clever.  Just the simple act of "leaf"ing their mark on your wedding tree.  


Guests can sign their name just below their thumbprint.  All it takes is an inkpad from your local craft store (we used a kid friendly "washable" one to make removal a breeze), a fine tip marker and some wipes available for quick thumb cleaning.   Green was used for this outdoor wedding, but the colors can be coordinated to match your day (or perhaps the room in your home where  you plan to hang the tree).  The leaves do not have to be limited to one color either.  Can't you just see this at a fall wedding with leaves in a few different shades of red and brown?  LovliDay will print the design for you and ship it to you for about $40 depending on the size of your wedding (they even include the little sign asking guests to "LEAF" their thumbprint!), or you can simply request that they email you a PDF file for only $16!  Yes, $16! I know, I could not believe it either.  Then with a larger format printer (ideally this should be at least 11x14) or at your local print shop (think Staples or Kinko's) you can have this printed for a few dollars.  And the end result turns out something kind of artsy that you will be thrilled to hang once you are back from your honeymoon.  All together you will spend less than $30-$50!  Not bad for something that is sure to really knock everyone's socks off!


P.S.  Are you planning a baby shower? Check out LovliDay's Baby Shower Tree!  The little bundle hanging from the tree is just too adorable for words. And what a great addition it would make to the nursery decor!

Photos courtesy of Jeffrey Vock Photography


Wednesday, October 6, 2010

Diamonds are a girls best friend!

Tiffany Theme Bridal Shower

There may not be a more recognizable gift package then the unmistakeable little blue box with the white bow.  And what could be a better theme for a bridal shower?  From the "Kimberly & Co." logo used throughout the event, to the diamond rings (keychains) each guest received as a favor, no detail was overlooked at this affair. And all tied together as perfectly as a white bow around a little blue box.  

Here are a few of our favorite details:

Sparkly diamonds appeared everywhere at this shower which was held in a family friend's home.  The escort cards were tacked to a board with diamond push pins.  A super cute detail, these were created easily by gluing large rhinestones onto flat push pins.  An easy DIY project that fit in perfectly with the theme.

Tables were set with classic gold trimmed white china set atop a Tiffany blue overlay.  Linens can be rented locally and online, but with a little diligence on the internet, they can be purchased for around the same price.  Check out www.efavormart.com for reasonably priced linens in a variety of colors.


And of course, no Tiffany themed bridal shower would be complete without an engagement ring.  Each guest received the most adorable diamond ring keychain that was presented in a little blue box with a white bow.  The box lid was stamped with a Kimberly & Co. logo design.  Too cute!  And check out that diamond confetti on the table in the background!